As we prepare for our website launch, I have been getting more and more questions about photographing and scanning museum collections. Digitization can be a difficult task when you're staring at thousands of objects and overstretched staff and volunteers. And what if you're a seasonal museum and you can't even access the building over the winter months? So many obstacles. So let's focus on making this task easier. How can you get the most bang for your buck?
General rules for photographing artefacts can be found on the ANSM website: Artefact Photography Tips. I've also blogged about the good, the bad, and the ugly of artefact photography. Many of those basic rules still apply, but here we're also going to talk about scanning small 2d items such as photographs, postcards and documents. I know I talk a lot about the importance of using a scale during photography, but the exception to this rule is when you're working in 2d.
How to scan:
1. The length and width of the scan should each be at least 1200 pixels.
2. If you aren't sure how to adjust the pixel settings, set your scanner to 600dpi, which should produce a good quality image in all cases.
3. Preview the scan first to make sure that the scanner hasn't automatically cropped out white space and that the item didn't shift when the lid was closed. You want the image to be as straight as possible, so take full advantage of that corner orientation.
4. If you have postcards or other two-sided documents, be sure to scan both sides.
5. Crop the image tight to the item. The original scan will likely have a bit of black around the edges that can be cleaned up.
6. Save the file as a tiff.
This image was obviously taken with a camera, following 3d artifact photography rules. Wow, is that scale ever distracting! And look at how much smaller the left image is compared to the right image. To make the improvement I just straightened and cropped the existing image in Picasa. This isn't ideal, but as you can see it's a big improvement. Here's what a properly scanned photograph looks like:
Scanning is a great way to get a lot of bang for your buck. Start with a folder or box, wherever you have these items stored, and just work your way through it. You'll be surprised at how quickly the work goes, and how great your images look when added to the database.
Feeling more adventurous? Maybe you have paintings, tapestries, or other large 2-dimensional pieces that are difficult to move. These objects can be photographed in situ, ie where they are. This makes the cropping process very important, as exhibit labels and other artifacts that can't be moved can get in the shot and distract you from the artifact.
1. Always use your tripod to set up a shot that is looking straight at the object.
2. Always use the camera timer so the camera will be still when the image is captured. Two seconds is adequate time to push the button and step back.
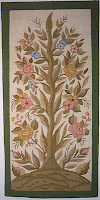
3. Make sure that the longest side of the object corresponds with the longest view in the camera. For this image, the camera was turned sideways to ensure that the tapestry filled the frame as much as possible.
4. Crop the image close to the frame or edges of the object. We don't want any distractions in the shot.

Notice the difference between these two shots. The second is much cleaner and the colour and detail looks crisper because there is nothing distracting the eye. And the cropping was done in a matter of seconds - well worth the time.
At the end of the day, these images are a direct reflection on your level of professionalism. So if you aren't satisfied with the image, or you think you can do better, redo it. Don't just attach something to the database for the sake of attaching something. In our fancy new website, that will make us all look bad.

 vs.
vs.


No comments:
Post a Comment