Wednesday, November 30, 2011

November 2011 Update

Workshops
Janet & Carole give some care & handling tips
We had two workshops this month, CCI's Artifacts in Aboriginal Cultural Centres, and our own Museum Management & Governance.  CCI's workshop was very hands-on, and they brought some fantastic examples of Aboriginal object for us to discuss.  The Management & Governance workshop was preceded by our first real blast of winter, but thankfully the weather was fine as we made our way to New Glasgow. It's hard to make this topic hands-on, but we had some great discussions and it was really interesting to watch the class grab onto certain pieces of information. There was some serious synchronized note-taking going on. We had great turnout for each, and are already talking about where and when the next workshops will take place (in the spring...no more winter travel). Thanks to the Glooscap Heritage Centre and the Museum of Industry for being excellent hosts.

Meetings
As I mentioned last month, we're garnering a lot of interest in our database renewal & website development work. This month I met with the CNSA to discuss their review of Archway and how we are currently on very similar paths. The recent departmental shuffle has put museums, archives, and libraries all under the same umbrella, and there seems to be general agreement that this is an opportunity for us to work together and do some great things. Anita and I also sat down with some friends from the Heritage Division to talk about our process and the sharing of collections information online. We're going to keep these discussions going so we'll be better able to coordinate efforts as all of our projects continue to align.  Very exciting times!

Also taking place right now are Community Museum Assistance Program (CMAP) meetings. As the program is currently under review, community meetings are taking place in each of the regions to ensure that museums' input is incorporated into the final report. If you have not already attended one of these meetings, I strongly urge you to do so.
Here's the list of dates & places:
1. Northeast Region - November 23, 930am-1230pm - Marigold Cultural Centre, 605 Prince Street, Truro
2. Central Region - November 30, 1-4pm - Fairbanks Interpretative Centre, 54 Locks Road, Dartmouth
3. Cape Breton Region - December 1, 1-4pm (storm date Dec.2) - Highland Village Museum, Iona
4. Southwest Region - December 6, 1-4pm - Greenwood Military Aviation Museum, Greenwood

Database Renewal Project - Website Development
We received official word that our SDI funding application for website development was approved. So now we can start to use all that research and background work to kick things into high gear. Our goal is to have the website ready for my 2012 summer site visits. This way I can give sites a sneak peak of their data as it is presented in the site. The official launch will still be September, so we've got 10 months to clean things up.

Chris has just finished up all sorts of documentation and policies. They are in the final stages of approval and should start to appear in our resources section before Christmas.  We've also revised the Passage Game Plan to better address public expectations. Here are the steps in a nutshell:
1. Enter all paper-based info, georeference objects
2. Do an inventory - fill in as many blank fields as possible and get a high-quality image of the object
3. Enrichment - conduct research to fill in more blanks and share personal stories for every object
4. Reconcile loans - there is no such thing as a permanent loan!

There will be an update to the system in the near future (before Christmas), which means that the database will be down for a few hours. Seth and I have been talking about this and will be sure to schedule it overnight so that it won't interfere with anyone's work. I'll be sure to send an email to everyone about the update when it is done.

Tapestry
Les Trois Pignons Centre Culturel
We are still making very excellent progress in the database. I want to commend you all for your hard work. I know it represents many hours and you've been fantastic about adjusting your work plan to prepare for our 2012 website launch.  Kudos to you!
So where do we sit this month?  Well, we added another 722 new records and 2,125 images! We now have 171,414 records and 41,820 images in the database.  Yay team!

And now for that ever-popular regional breakdown:
Southwest - 83,904 artifacts, 17,323 images
Central - 34,735 artifacts, 8,696 images
Northeast - 32,461 artifacts, 12,599 images
Cape Breton - 22,014 artifacts, 3,202 images

Congrats to the Central region for adding the most artifact records and images this month. They had some stiff competition from the Southwest for the artifact records, but blew everyone out of the water with the images.

I am amazed at how many images are being added each month. This is exactly the kind of progress we want to see as we work on website development.  I've been getting questions about artifact photography and the dating of artifacts since we have identified these tasks as priorities, so Chris and I are working on some blog posts to deal with these issues.  Let me know if you have other areas that you'd like addressed and we'll do our best to accommodate.

Tuesday, November 29, 2011

Photographing the Small Stuff

So we've looked at 2-dimensional and 3-dimensional photography, and now we're going to focus on all those tiny artifacts in the museum. This can include coins, buttons, pins, small stone tools, lead shot, badges and medals, etc etc. We've got lots of little stuff, and it requires special attention.

1. Set the camera to macro. This is the little flower icon, and allows you to get much closer with the camera lens. With the Passage-supplied cameras, you should be able to get within 5-10cm of the object. Don't forget to you use this setting on larger objects as well when you want to get a detail shot. And all those ceramics, silver, and other stuff with makers marks stamped on the bottom - macro is your best friend.

  2. Use your tripod. Since the macro setting sets a longer exposure time, the camera needs to be absolutely still for the the image to be clear. Try as you might, a shot without a tripod will not be as good as one with a tripod. Small tabletop tripods are also available and well worth the investment if you have a large collection of tiny artifacts.

3. Use the self-timer. This is another very helpful tool when using macro and a tripod. Set the timer to two seconds (or something comparably short) and push the button. So if your hand bumps the edge of the camera or the pressure of pushing the button moves the camera slightly, the lapse in time allows for everything to settle before the shot is taken. It also ensures that the longer exposure takes place without movement, thereby giving you a much clearer image.

If you are comfortable playing with your camera settings, you can also try adjusting the aperture (generally speaking, a larger f-stop number gets you a better close-up shot), but the auto settings coupled with macro should give you a decent image.

Ok, now let's look at some tiny artifacts from our collections.

First up is a lovely fake tortoiseshell hair comb. It's small, but not tiny. However, the detail of the marbled plastic can quickly be lost if the picture is not taken close-up. One of the general artifact photography rules is to centre the object in the shot, but if the scale is larger than the object, this can really ruin the aesthetics of the shot.

      VS. 
In terms of setup, this is a great 3d artifact image. The object is dark so the light background fabric was used to provide contrast, the scale is pretty straight, the image is cropped, and the colour is decent (a bit dark). But where the object is so small, the scale is a little overpowering. So again using Picasa, I cropped out the edge of the scale so that the measurements are still visible, but the scale becomes less of a focal point. The only thing that would have made the shot even better would have been putting the comb closer to the scale so that it would be truly centred in the shot.
Remember, the scale is not what you are photographing. It is a reference point that should be included, but it's perfectly acceptable to crop out one side, or in the case of this, the outer edges of both sides.

Here's a tiny object with even more cropping. Since the ends of the scale would have left a lot of dead space in the shot that would take away from the artifact, they were cropped out. But we can still tell that this object is about 4cm in length and 2cm in diameter. As with the hair comb above, the object should be a bit closer to the scale, and a few little fine touches would have improved the shot, but you get the idea.
What if you don't have a scale? I know that some sites have made their own, or have tried to use a normal ruler instead. If for some reason you cannot have a scale in the picture, follow the same steps above and focus on centring the artifact (and don't forget to crop once you transfer the image to the computer). Here we have a biface from the south shore. Since this object is very light in colour, it was photographed on a dark background. The macro setting was used, which is why so much detail in the stone can be seen.  The photographer took the time to play with the camera settings to ensure that the aperture, ISO, and white balance produced a high-quality image. The tripod and timer were used to ensure that a clear image was captured (I'm not just making all this up, I was there when the image was taken).  The measurements are noted in the object record, which means that even without the scale, the audience will still know the size of the object.

2-Dimensional Digitization


As we prepare for our website launch, I have been getting more and more questions about photographing and scanning museum collections. Digitization can be a difficult task when you're staring at thousands of objects and overstretched staff and volunteers. And what if you're a seasonal museum and you can't even access the building over the winter months? So many obstacles.  So let's focus on making this task easier.  How can you get the most bang for your buck?

General rules for photographing artefacts can be found on the ANSM website: Artefact Photography Tips. I've also blogged about the good, the bad, and the ugly of artefact photography. Many of those basic rules still apply, but here we're also going to talk about scanning small 2d items such as photographs, postcards and documents. I know I talk a lot about the importance of using a scale during photography, but the exception to this rule is when you're working in 2d.

How to scan:
1. The length and width of the scan should each be at least 1200 pixels.
2. If you aren't sure how to adjust the pixel settings, set your scanner to 600dpi, which should produce a good quality image in all cases.
3. Preview the scan first to make sure that the scanner hasn't automatically cropped out white space and that the item didn't shift when the lid was closed. You want the image to be as straight as possible, so take full advantage of that corner orientation.
4. If you have postcards or other two-sided documents, be sure to scan both sides.
5. Crop the image tight to the item. The original scan will likely have a bit of black around the edges that can be cleaned up.
6. Save the file as a tiff.
    vs.
This image was obviously taken with a camera, following 3d artifact photography rules. Wow, is that scale ever distracting! And look at how much smaller the left image is compared to the right image. To make the improvement I just straightened and cropped the existing image in Picasa. This isn't ideal, but as you can see it's a big improvement.  Here's what a properly scanned photograph looks like:

Scanning is a great way to get a lot of bang for your buck. Start with a folder or box, wherever you have these items stored, and just work your way through it.  You'll be surprised at how quickly the work goes, and how great your images look when added to the database.

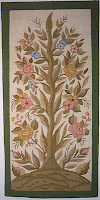
Feeling more adventurous? Maybe you have paintings, tapestries, or other large 2-dimensional pieces that are difficult to move.  These objects can be photographed in situ, ie where they are. This makes the cropping process very important, as exhibit labels and other artifacts that can't be moved can get in the shot and distract you from the artifact.
1. Always use your tripod to set up a shot that is looking straight at the object.
2. Always use the camera timer so the camera will be still when the image is captured. Two seconds is adequate time to push the button and step back.
3. Make sure that the longest side of the object corresponds with the longest view in the camera.  For this image, the camera was turned sideways to ensure that the tapestry filled the frame as much as possible.
4. Crop the image close to the frame or edges of the object. We don't want any distractions in the shot. 

vs.

Notice the difference between these two shots.  The second is much cleaner and the colour and detail looks crisper because there is nothing distracting the eye. And the cropping was done in a matter of seconds - well worth the time.

At the end of the day, these images are a direct reflection on your level of professionalism. So if you aren't satisfied with the image, or you think you can do better, redo it. Don't just attach something to the database for the sake of attaching something. In our fancy new website, that will make us all look bad.

Monday, November 7, 2011

Museums and Remembrance Day - 2011 Edition

Last year I wrote a Remembrance Day post in honour of my grandfather and his contribution to the RAF in WWII. While my grandfather and his brothers all returned home safely, my grandmother's family was not as lucky. The biggest blow to the family was when her youngest brother was shot down over Belgium during a bombing run. The stories and objects associated with Grenville have now become part of the Stanley family lore.
All too often this kind of information is excluded from museum collection records.

the musician
Grenville was elevated to a sort of immortal status in the family, having two nephews named after him, and a few semi-shrines established in his parents' and siblings' homes. He was the promising youngest son who never got to live out his potential or truly experience life. The stories that have been passed down about him reveal him as a very kind, caring individual, full of life and love for his fellow man. He played the clarinet in the Salvation Army band, volunteered with youth, and planned on becoming an Anglican minister after the war. His nickname was Bumps. His cheerful personality made him very popular in his squadron, Bomber Command No.76, and when that terrible letter arrived at my great-grandparents' door, his courage, skill, and popularity were all referenced.

young love
We also know that he had a special lady friend who he was planning on marrying. Her name didn't make it on any of the photographs, but there are enough images of these two to know that they had something special; that they looked forward to building a life together when the fighting finally stopped. The story goes that he was on his last bombing mission before heading home for his wedding. I don't know what happened to this poor girl whose heart was broken - the family didn't maintain that tie and she has now faded from memory.

the wireless operator
His military record sheds a lot of light on his war-time activities, but also has a lot of blacked-out sections that leave the reader guessing.  We know that P/O Stanley served as a wireless operator on Halifax bombers, making night-time runs into Germany. We know that when his plane went down, only one man survived and became a POW. Grenville was buried in Schoonselhof Cemetery, Antwerp Belgium, alongside many other promising young men whose lives were cut short. He was only 23 years old.

Having suffered the sudden and unexpected loss of a very significant person in my life, I understand how difficult it is to talk about it. You want to focus on those good memories and silly quirks that make you smile. Those things that used to drive you crazy seem far less important, and so you let them slip from your memory. It's just natural that certain aspects of the story are maintained, others are lost, and some are altered slightly through retelling. So when museums interview donors to find out the stories behind the objects, we always end up with a slightly altered truth - the lore of that object.

Artifact records will always have loose ends and unanswered questions. Some purists will refuse to include family lore in their records because they want only the proven facts, but in my mind these stories are a valid and important part of the object's history. The museum exists to provide answers about the past. Sometimes we will have wonderful proven facts to include in our records, but other times we will have fascinating stories that have been passed down for generations. Maybe the story isn't always 100% accurate, but there is something very special about reading a record that tells me how the family talked about and treated the item.

I don't know what Uncle Gren was really like, if he truly was on his last bombing mission, or what all of his plans were for after the war. But I do know that we cherish the family memory of him; that we will never forget the sacrifice that he made. And one way that we can pay tribute to him is through the sharing of the family lore. 
lest we forget